Maintaining Your Timber Frame

Maintaining Your Timber Frame

What you need to know to keep your beautiful timbers in top form.

You made a great choice in choosing to feature timber in your home’s design.  Thank you for choosing Cornerstone Timberframes to be your supplier of fine structural and decorative timber!


As a new owner of a timber frame there are only a few things you need to have in mind as the years go by.  There are two items that are common to virtually all timber frame structures:

  • Cracks (seasoning checks) that form as heavy timber dries down in response to interior humidity levels.
  • Best practices for maintaining exterior finishes on timber.

Let’s start by looking at the first issue:

Timber Checking (crack lines in posts and beams):

Humans have used timber in their homes since before recorded time, but only in the last two hundred years have our habitations become as separated from nature as they are now.  In most ways, that’s been a great improvement, but when it comes to humidity, it means the air in our homes has never been drier – especially for homes in colder or higher parts of the country.

Nothing to worry about - wood becomes stronger and stiffer as it loses moisture.

When a tree becomes a timber post or beam for your home it still holds a portion of its living moisture.  At Cornerstone, our timbers spend time in a conventional drying kiln, but this can only draw moisture from the outer inch or so. This helps stabilize the timber and the kiln’s heat protects against sapstain.  In the following months the remaining moisture will leave the timber.  As it dries, it is also shrinking slightly in girth. Cracks will form parallel to the wood grain as tension is released.  These are called seasoning checks. Checks can form in multiple fine lines on two or more sides or be concentrated in one larger crack on one face of a timber.

Seasoning checks are natural and unavoidable. Large timbers will usually have more checks than smaller timbers and these also tend to be more visible.

Reducing Checks

While you can’t avoid checks altogether, there are a couple strategies you can use to decrease their number and size.  The idea is to slow the rate at which your timbers lose their moisture.

Humidistats provide helpful feedback.
  • Your home’s interior humidity is key. Use a humidistat to keep an eye on the relative humidity of your home as soon as construction reaches “lock-up” and during the first year of heating and cooling. In winter, humidity levels should be kept at or above 30% and in summer a range of 40-50% is good.  Humidifier units can be stand-alone or integrated into your home’s HVAC system.
  • High temperature also contributes to checking. In a sunroom or any space with large windows solar gain can push local temperatures well above those programmed into your home thermostat. Higher temps when combined with dry winter conditions pulls moisture more rapidly from your timbers. During the first year, use blinds to reduce solar gain whenever possible, and go easy on fireplace use.

Treating Checks

Sometimes a large check occurs in a spot where it’s visually annoying.  If your stain colour is dark, the check exposes the lighter coloured wood and it’s the contrast that catches the eye. 

There’s an easy solution that many clients can apply themselves:

Use an atomizer-type spray bottle.  These can often be found at pharmacies, hardware stores, and discount shops. The key is that it can spray a very fine mist.

Fill it with the stain used on your frame.  Contact us if you need to confirm the colour and strength applied to your timbers.

Test the atomizer on a piece of scrap wood or paper, so you have a feel for how it works.  Then spray the stain into the checks you want to treat and use an absorbent cloth or paper towel to wipe up any excess or runs.

One pass usually provides good coverage.  If a second coat is needed, check to ensure that the first coat is dry to the touch before re-applying.

While a check will never truly disappear, removing the visual contrast makes it much less noticeable.

Cleaning Timbers:

Sansin finishes are durable and easy to clean.  Inspect your timbers’ appearance periodically, especially exterior locations where air borne dust and dirt exposure can be high.  To return your timbers to their full lustre and beauty a simple, quick cleaning is needed.  Use a soft cotton or microfiber cloth with lukewarm tap water and a small amount of gentle dishwashing soap.  The cloth should be wrung out well, leaving it damp.  Rinse your cloth frequently, change water, and add soap as needed.  Finish the cleaning, with a final wipe down using clear water.

Maintenance of Sansin Finishes:

Your interior timbers are unlikely to require any finish maintenance for as long as you own your home.  Possible exceptions may be handrails or other timbers that are frequently touched (like a post at a high traffic corner). 

For your exterior timbers, maintenance is a routine that you will determine as you live in your home through many seasons.  The key to success and an easy maintenance cycle is to observe where timbers need help and to be pro-active in protecting them.  Sun and weather-exposure are the key determinants of where and when you need to apply a maintenance coat.  Keep an eye on your most sun-exposed posts, fascia, and gable trusses.  When you see a hint of cloudiness or fading in the finish this is your sign that a maintenance coat is needed.

Applying an exterior maintenance coat is straight-forward.  You can do this yourself or hire a company that specializes in applying exterior maintenance finishes.

  • Wipe timbers clean (see “Cleaning” instructions above)
  • Use 220 grit sandpaper or a super-fine sanding sponge and lightly scuff the surface.
  • Blow off or wipe with a soft cloth to remove dust.
  • Apply a topcoat of Sansin SDF Naturals in a ½ strength coat of your stain colour.

To purchase Sansin products:

Use Sansin’s online dealer locator.  Your local Sansin dealer can help you with the right tools and their extensive experience using paints and stains. To ensure that you purchase the correct stain, tinted to the proper strength, please contact your Cornerstone sales representative and request the details of the stain colour applied to your timbers.

Application Methods:

Be sure to read and follow the application instructions on the can. Stain can be easily applied by brush. 

Cornerstone’s favourite way to apply stain is with a synthetic lamb’s wool pad, edge stapled onto a block of wood. These pads are available at most full-service paint stores.  You simply dip the block with pad into your paint tray, remove any excess that might drip, and draw the pad along the timber, making sure you get good coverage, and watching for drips.  Keep a wet edge, back brush as needed and you’ll soon have the job done!

If you have any questions for anything not covered in this blog, feel free to contact us! 

Indigenous Peoples Day

Indigenous Peoples Day

National Indigenous Peoples Day is this Friday, June 21

This is a day recognizing and celebrating the cultures and contributions of the First Nations, Inuit, and Metis indigenous peoples of Canada.

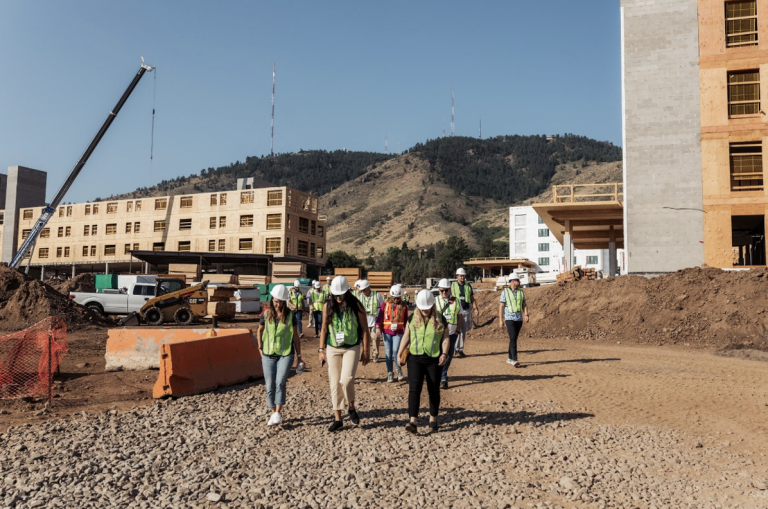
We’re a tour group of eight: engineers, foresters, and timber advocates – all with open minds but little exposure to Indigenous life, history and worldview.  We spent the morning touring the Weyerhauser LSL plant NE of Kenora. The wood supply for this plant comes from land that is managed by a local First Nations resource management company called Miisun. It’s heartening to see First Naitons playing an active role in how their traditional lands are used and protected.  It feels like this could be the basis of a mutually respectful relationship.

Our tour guide for the day is Matt Wilkie, Weyerhauser’s local “Purchase Wood & Systems Leader”.  He’s a bright light, radiating personal warmth.  Matt loves getting people together to share their stories.  He wants us to see and experience one of his favourite places: a healing center at Bug Lake called Gamikaan Bimaadiziwin, Ojibwe for, “I will find my life again.”

Bridges are being built

Caught in cycles of harm or despair a person may reach a point where they know they need help.  For First Nations people, the Western ideas of clinical diagnosis, therapy and treatment can offer some relief, but it struggles to reach the deep disconnection and loss that often drive indigenous cycles of harm and pain. Five years ago, Elder Langford Ogemah had a vision for a place where those seeking recovery, could reconnect with their culture, learn skills, participate in ceremony, and draw on the power of the land and their place in it.  The program is voluntary and open-ended to meet the unique needs of each person’s journey.  And with typical Anishinaabe generosity, the healing center welcomes everyone, whether indigenous or not.

The road into Bug Lake is serpentine and bumpy. As we disembark, we’re greeted by Jackie Marcine and Dave Lindsay. Jackie is a healing guide who exudes a serene energy, while Dave, a Fish & Wildlife Officer for Treaty 3, is exactly the person you’d choose to have with you on a backwoods journey – a kindly teacher-guide, bundled within the power of a bear.

They show us around the camp. It’s mid-day and my stomach is growling. We visit the log yard where a horizontal bandsaw mill will eventually be sheltered under a roof anchored between double stacked sea containers. The mill provides construction lumber for the camp while offering practical skills to program participants.

Three 12’x20’ cabins, a ceremony lodge and a central roundhouse are nearing completion.  Architect renderings, on display in one of the cabins, suggests this Bug Lake campus will eventually be able to accommodate 25-30 participants and supporting staff.  By the time our tour is done, I’m beginning to feel famished.  What greets our eyes as we approach the Round House assures me that my hunger will soon be sated.

Big Kevin, a friend of the Center is here to get the lunch ready. He’s working off a table at the front of the round house, preparing fillets of freshly caught walleye. As we chat the battered fillets are going in and coming out of a pan of hot oil. They smell so good!

When the walleye is done, our group enters the round house, and we make our way to the food table.  In my hand is a plate of walleye, a wild rice salad, Bannock, and a green salad. And yes…my mouth is watering.

But what’s this, two late guests are arriving.  We’re being joined for lunch by Ogichidaa Francis and Betty Kavanaugh, two inspiring, heartful elders of the Treaty #3 nations. Ogichidaa means Grand Chief, and Francis was chosen as Ogichidaa through a traditional discernment process.  He’s dedicated 45 years of his life to serving the Anishinaabe Nation in Treaty #3. 

Grand Chief Francis and Betty Kavanaugh live and lead with kindness and humour.

It’s a huge honour to have the Kavanaugh’s join us, but my tummy is rudely suggesting I shove a big piece of walleye into my face before going to greet them.  I silently thank my mom for the power to resist this discourtesy.

When Francis and Betty are settled with food, we all begin to eat.  The food is just too tasty to describe here in a paragraph.  During the meal we hear about the history of the region, a people’s struggle to be treated with respect, the need for healing, and a future of shared prosperity and caring for the land.  The Anishinaabe of Treaty #3 live in 28 communities sprinkled across an area of 142,000 square kilometers in NW Ontario. That’s an area bigger than Greece or Iceland!

This land is rich in everything needed for life. A gift from Creator, to be respected and protected.

I’m taken with the sense that these are a people who are taking their lives back.  They are standing up as equals, bringing special insight into the multi-crisis that confronts all of us.  Their message:  we need to live in right relationship with each other and the land, and we must partake in loops of reciprocity, responsibility and respect that are the basis of walking a good path in life. 

We have much to learn, but I’m filled with hope, as we could not ask for better, more generous teachers.

Maintaining Your Outdoor Timbers

3 Rituals That Will Change Your Life!

Okay, the attention-grabbing subtitle could be a slight over-sell! Nevertheless, I think you’ll see there is a beauty to maintenance that can bring joy and satisfaction to those who do it. It goes along with the notion that as humans we are at our best as caregivers, fixers, and restorers. Studies in human health show that people who do mindful tasks and chores reap a series of benefits from a heightened sense of wellbeing to improved memory and creativity. So, consider these timber maintenance rituals as simply exercises in personal wellbeing!

Three Timber Rituals for Spring
1. Clean
Winter can be tough on home exteriors. Take a few minutes to do a “circle tour” of your
home and get a good look at your exterior timbers. If you wash your windows every spring,
this is also the perfect time to wash your timbers!
Prepare for Cleaning:
 Two Buckets, 15L (3 gal), fill one with warm water, adding a few drops of mild
detergent. Fill the second with just warm water, for
rinsing.
 Two microfiber cloths, large, one for each bucket.
 Rubber gloves
 Step-up / ladder to safely reach timbers.
 Alternative for hard-to-reach spots: a soft bristle car
washing brush on an extension pole.
Cleaning Tips:
 Let the microfiber cloth hold as much water as possible (“sopping wet”) for a first
pass over the upper faces of the timbers, allowing the excess water to help flush
away grit and dirt with the least possible amount of pressure. Repeat as necessary.
 Once the dirt is gone, switch to the rinse water. Two rinse passes with a sopping
wet and then wrung out “damp” cloth will finish the cleaning.
 Be sure to change water frequently. This will help you avoid streaking, so it’s worth
the effort!
 Let the timbers air dry. Inspect for missed spots and assess the condition of the
topcoat.
2. Add a New Topcoat


You’ll know it is time to apply a new topcoat when the lustre of your finish is getting dull, or
the finish is beginning to look cloudy. Sun exposure is usually the key factor in how
frequently a new topcoat is needed. Timbers in a shady spot under a roof, may never
need more than a cleaning, while posts with a lot of sun exposure will need more regular
attention. Adding a topcoat is easy.

Preparing for recoating:

 A can of Sansin SDF Topcoat, tinted to ¼ strength of your basecoat colour. You
can find this information on your “Finishes & Maintenance” page which is sent out to customers either before or just after a timber installation.

If you can’t find your stain information, call or email us, and we’ll be glad to look it up in our system.
 Regular painting tools: brush or lambswool applicator, tray, drop sheet.
 Fine sandpaper: 220 grit is ideal.
 A tack cloth or damp microfiber cloth.
Tips for recoating:
 If you completed the cleaning ritual you’re well on your way. If not, make sure
you’ve done that before continuing.
 When your timbers are fully dry, use the fine 220 grit sandpaper to lightly scuff the
old finish. This will ensure good adhesion of the new topcoat.
 Wipe down with your tack cloth / damp cloth to remove dust from the sanding step.

 For applying a new topcoat, the ideal time and day is when your timbers are in
shade and when the winds are calm. Avoid applying in direct sun or on windy days
that will cause the finish to dry too quickly, leaving brush marks and dry lines.
 Starting at the top, apply the Sansin Topcoat, back-brushing as you go to ensure an even coat. The idea here is to maintain what painters call “a wet edge”. The topcoat dries quickly so you want to complete a full face of a timber before stopping for a sip of coffee or answering a phone call. If you do pause mid-piece, you risk having a visible dry line, or obvious brush marks showing up in your finish.
 Keep an eye for any runs, especially at corners or where two timbers meet. Back
brush these promptly.
 You’re done! Wash up brushes with water.

3. Record
Quite possibly the easiest step… to forget!
What to record:
 Use your phone and take photos of the areas you recoated. Not only does this feel good, but it will also help you remember the timbers you top coated and provide a
date for when you did the work.
 Also write down the date and details on your “Finishes & Maintenance” page and
store that in your home projects file where you will easily find it again. Backups are always a good idea!

That’s it! Thanks for being the maintenance finishing hero that you are!

If you have any questions about timber maintenance, we’re here to help. We also enjoy hearing about our client experiences with maintaining their timbers. Be in touch and let us know about your experience.

Interview with Doug Kehler

Interview with Doug Kehler

Finishing Department Manager
Timber Purchases + Logistics

Get to know our Cornerstone Team!

Today, we are happy to share a candid interview with Doug Kehler, who is the Finishing Department Manager, Timber Purchaser, and Logistics expert at Cornerstone Timberframes. Doug has been an integral part of our team since 2018, and we cannot wait to introduce you to one of the important people responsible for our successful projects. 

We hope you enjoy reading this interview and getting to know more about our team and their passion for their work.

What is your role at Cornerstone?

I was hired to manage the Finishing Department in 2018, but recently I have added the job of purchasing timber, tongue and groove boards, fasteners and organizing the shipping and receiving for the company.

The day-to-day work inside our Finishing Department is now taken care of by Agnes.  She sees that the right finish gets applied and takes care of how that happens. I manage the workflow of jobs coming into the shop and make sure that Agnes has all the information she needs and support for HR issues.

What did you do before coming to work for Cornerstone?

I worked for 17 years in concrete forming, getting ICF walls set up for pouring.  Most of that time I worked as a trade for a general contractor, but also worked as a GC myself and spent a couple years running a company with my brother-in-law.

Tell us a little about your early years.  Did you grow up in this area?

Our family ran a small beef farm a few miles south of Steinbach, near a place called Friedensfeld.  In high school I enjoyed the shop program and especially enjoyed carpentry and construction.  My Dad encouraged me by purchasing lumber and letting me build sheds and shelters and other stuff on the farm.

Coming out of high school, I worked at the ice rink in Mitchell for a couple years. The rink is the social center for Mitchell. I made strong connections with people there and got to know the Peters family well.  They were big into hockey.  My youngest sister was good friends with Tanya (Peters) Bachmeier, having gotten to know each other through ringette.  Nevin Bachmeier was always around the rink too, with his brothers playing a lot of hockey.

You’ve got a close connection to Haiti, and it has a big place in your life. Why is that?

In 2017 a friend of our family went down to Haiti to start a foster home, because there were lots of kids on the streets without parents or anyone to care for them.  A bunch of us went down to help them get set up.  I spent a couple weeks building furniture and doing repairs.  Seeing the situation there, first-hand, was eye-opening.  We adopted a boy and a girl, and it took a while for them to get here.  She’s 14 years old and doing great.  Like a typical girl her age, her friends mean everything to her.  Our boy is 17 and he impresses us, more mature and wiser than his age, and making good choices.

What are some of the challenges you face in your work?

People: finishing work is demanding and you’re doing a lot of the same thing, but you need to keep on top of it, maintaining a high standard.  Not everyone is up for that.

The other challenge is the size of the jobs we’re doing, the overall project size as well as the individual pieces, both keep getting bigger.  When our finishing shop was built in 2018, it seemed large, but we now need more space.  Case in point – we currently have a job with pieces so big and heavy they can’t be handled in the finishing shop. We’re working on them in the Production Shop, which is kind of bunging up their workflow. Instead of handheld sanders, we’re using floor sanders!  The pieces are wider and longer than a lane in a bowling alley!

What surprises you most about what you do now, and what you’ve learned in your job?

When I think about what I did before, construction and concrete forming, and what I do now, working with colours, that’s kind of amazing.  Like a lot of guys, my wife would let me know that sometimes my clothing choices were hard on the eyes, “So, you’re wearing those two together!?”  And now, customers come in with a colour they want matched, and I’m telling them, so that’s a warm brown colour and to get that on douglas fir, which has a red undertone, we’ll need to pull in some green…”  For an old construction hand, that’s probably been my biggest learning curve. Go figure how that ever happened!

What are you looking forward to in the coming year?

With all the big jobs my focus is going to be maintaining and improving workflow. 

On the shop front, there’s been talk of adding more space, but that’s a big item so we’ll see what happens there.  One thing that is helping extend the use of our current space, is the new sander that got added to the production shop this past winter. It’s reduced our sanding time by 60%, so that means we can get more through our shop in less time.  That helps, though eventually, on this growth curve, we’ll need more space.

A lot is about doing whatever is needed in the moment.  I’ve owned my own company for 15 years, so I learned to roll with the punches.  It may not look like there’s enough time, but jumping on a truck to make a delivery, if that’s what the company needs, you do it.  There’s always fires to put out, and you just take them on, starting with the biggest and doing your best to get to all of them.

Thank you Doug for the work that you do! We are so pleased to have you on our team.